Andys Handcuff Collection
"Making Of" Andy HS104 V2A
main page
[previous]
[1]
[2]
[3]
4
[5]
[6]
[next]
Swivel Assembly
Swivels are made from holders for steel cable used for boats. They have an eye and a hollow tube
for pressing around steel cable. I have made a nut by turning lathe and cut it to a shorter length.
As you can see on figure 15, the hole in tube ends in the cutaway part, my processed swivel is
massive. You can see unprocessed swivel, swivel with nut and swivel cut to final length, also
swivel bearing block and assembled swivel in block.
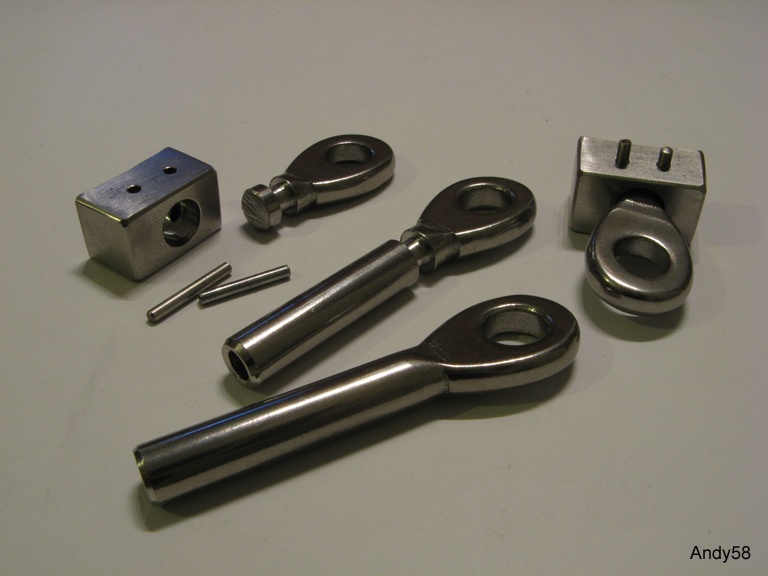
Figure 15: swivel assembly
Swivels are pivot-mounted in blocks made from squared steel bar. Two small boreholes perpendicular
to main hole are for 2mm pins fitting in nut of swivel. These blocks are curved at one side to fit
snugly on bows of cuffs. Curves are made by grinding wheel in milling machine, it was not easy to
get the right curvature.
Hinge
These were the most time consuming parts. 22mm holes for tube will not remain exactly at the same
place as punch marking and first drill. So flat steel bar for hinge is greater to all sides as
needed. After drilling 22mm hole the bar had to be cut at all edges for final form.
For drilling greater hole i used a bench drilling machine, only this has enough power for this
holes. Drilling was started with diameter of 2mm and continued with increasing steps of 1mm
until a diameter of 6mm was reached. From that point a special drill with steps from 6mm to 30mm
was used (figure 16). Surprisingly this drills from hardware store are much better than all
standard drills from the same shop, so i needed "just" two of them for 8 holes...
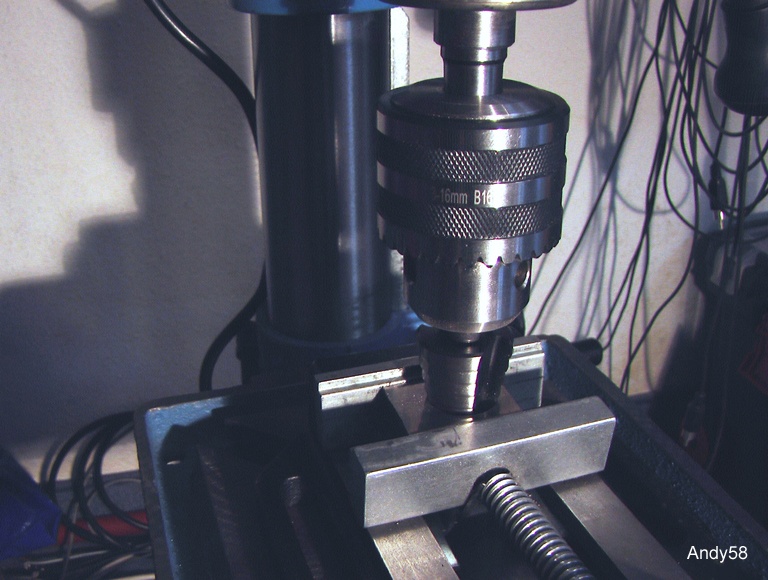
Figure 16: drilling 22mm holes for hinges
Now all edges had to be cut, also the nuts for hinge. This was very time consuming, for precise
dimensions i used a cutting wheel in milling machine (figure 17). Total length of cut edges for
8 hinges are more than 1.2m (ca. 4 feet) of 5mm stainless steel. Time for this parts are more
than two months - more than one weekend for each single hinge.
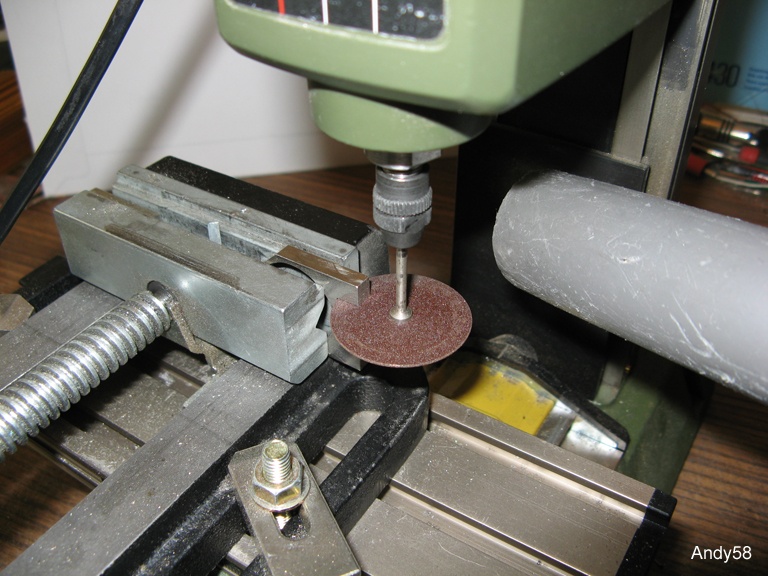
Figure 17: cutting hinge nut
Finally 2mm holes has to be drilled across for the hinge bolt. Figure 18 shows how hinge is
connected to bow.
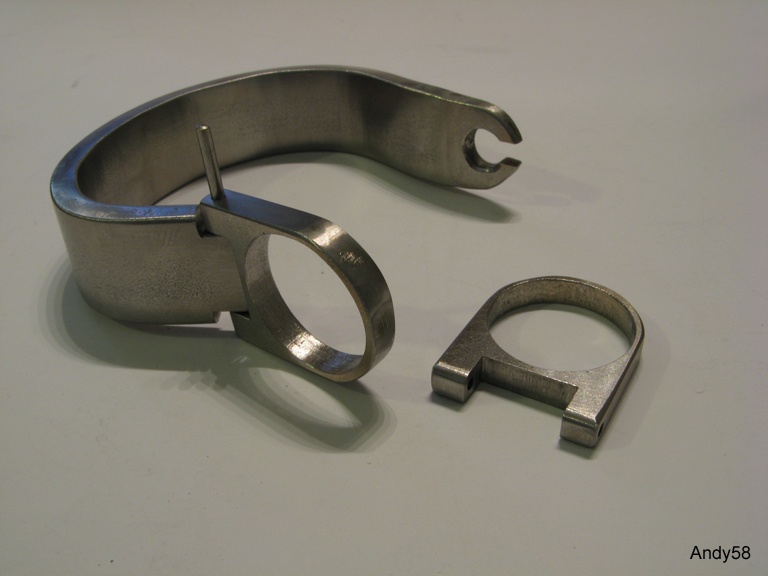
Figure 18: hinge assembly
[previous]
[1]
[2]
[3]
4
[5]
[6]
[next]